Tubeless tires for MTB, cyclocross, gravel, and road bikes can leak for several reasons. While this is frustrating, the good news is that leaks are typically relatively simple and inexpensive to fix, and it won't take long to get back on the road or trail.
Let's take a look at some of the common causes of tubeless tire leaks and how to fix them:
The tubeless tire sealant has dried up or evaporated
Tubeless tire sealant is made with a liquid carrier. Over time, the liquid can dry up due to evaporation. This is especially common in the American Southwest, where dry weather with low humidity is common. When you remove the tire, you might find the sealant is gone entirely, or has congealed into lumps some riders call "Stan's Boogers", named after the popular Stan's NoTubes sealant brand.
If your previously reliable tubeless tire used to hold air but doesn't any longer, it's possible the sealant is completely dried up. Another giveaway of dried-up sealant is a tire that "self-repaired" punctures from thorns initially, but later stopped. If a thorn punctured your tire, and the sealant failed to fix it, adding fresh sealant will usually resolve the issue.
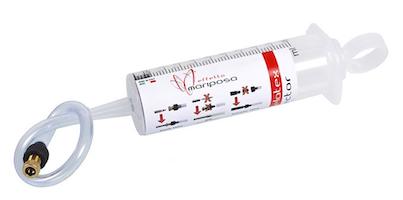
There are two techniques to add new sealant. You can:
The tire bead is not flush against the rim
For the tire/rim interface to be airtight, the bead of the tire must be flush and fit snugly up against the matching hook bead pocket in the rim. Sometimes when you are attempting to mount a new tire on a used rim, the hook bead on the rim can have dried sealant, mud, or grit stuck on.
To fix this, remove the tire entirely, and drag a shop rag around the entire diameter of the hook bead, repeating this process on both sides of the rim. It should slide smoothly around without resistance. If you feel any bumps, investigate and make sure to remove them.
This issue can also affect used tires, which can have old, dried-up sealant stuck on the tire beads. As above, make sure to remove any old sealant so that the bead lies flat against the rim and then try remounting it.
Tubeless rim tape has migrated or shifted, exposing the spoke holes
Most bicycle rims have a hole drilled in the rim that allows the spoke nipple to be installed from the tire side. These holes allows air to escape and need to be completely covered for tubeless use.
New rims often come with tubeless tape already installed over the spoke holes for convenience, but it can shift under use. For example, if you had to use a tire lever to remove a tire, the tire lever can push the rim tape off-center, exposing the spoke holes. Once the spoke holes are exposed, the system is no longer airtight and will leak.
Sometimes you can push it back into position to cover the spoke hole, but if the tape has split (usually due to age) or the adhesive no longer holds to the rim, it's time to replace the tape. Pull the old tape off completely and thoroughly clean the rim before installing new tape.
The tubeless valve is loose, or poorly fitted
As with the spoke holes, the rim is also drilled to allow the tubeless valve to pass through. There is a rubber grommet or fitting on either side of the rim to create an airtight seal. Check the locknut on the valve to ensure it's snug (but don't over-tighten) and well-sealed.
If you suspect air is escaping from the valve hole, try letting all the air out of the tire, press down on the tire just above the valve, firmly push the valve toward the hub, then tighten the locknut to hold that adjustment.
Using the wrong valve can also create a poor fit with the rim. There are a few common rim shapes in use and the valve needs to match. For example, the tubeless valves that come with some Shimano wheels have a unique shape that doesn't interchange with others.
To avoid this issue, use the valves that were originally included with your rim/wheel, or the specific valve recommended by the rim manufacturer.
The tire itself is damaged or destroyed
If the previous 4 causes have been ruled out, look to the tire itself. Check the sidewall and tread for cuts. Tires damaged in this way can sometimes hold air in a workstand, but will leak once ridden because the rider's weight causes the tire casing to flex, widening the cut.
Small cuts can sometimes be booted from the inside if the rest of the tire looks OK and has tread life left. If not, it's probably time to replace the tire.

