Today we’re talking about setting the right tire pressure for cyclocross racing and training. I’m going to first cover the hardware you need, how to use the tools, and then we’ll talk about how to put it into action on race day.
If you’re new to RideCX, thanks for dropping by... cyclocross makes me happy, and I’d love to share it with you!
Over-inflating your tires is a mistake
From time to time I get to conduct beginner clinics to introduce new riders to the sport, and it’s VERY common for riders to show up for their first race, they’ve never ridden a bike off road before, and their tires are pumped up, hard as a rock. They’ve got this misguided understanding that their bike will be faster with a higher tire pressure.
For cyclocross, the exact opposite is true. The pressures used in cyclocross tires, especially tubulars, in the worst wet and muddy conditions can be shockingly low for new riders. I remember reading some comments from Mark Legg, who is Katie Compton’s husband and mechanic and he says she could feel that type of very subtle change to tire pressure in the way her bike corners and handles, and sometimes requested tire pressure changes in ½ PSI increments.
Maybe you aren’t KFC and haven’t spent decades mastering your craft, and you can’t feel a ½ PSI difference (me neither). But even beginners riding off-road for the first time can easily feel the difference 3 PSI makes.
Go faster with the right tire pressure
The right cyclocross tire pressure can offer better handling, more comfort, and additional cornering grip; while also preventing damage to your rims and unnecessary flat tires. Unlocking the tire pressure mystery is a “free” way to get higher performance and more speed, ultimately yielding lower lap times. So how do you set and measure tire pressure, and then how do you find the right pressure for your weight and riding style?
The gauge on your floor pump is not very accurate
First thing you need to know is that the basic gauge built into your floor pump isn’t going to cut it for setting tire pressure for cyclocross. If you’ve got a Park Tool, Topeak, etc. floor pump it’s probably got a gauge that goes up to something like 150 PSI. The pump itself works fine for adding air, but the gauge simply isn’t precise enough.
As I mentioned we run very low tire pressure for cyclocross, something like 20 PSI would be quite common for racers. The difference in the way your bike handles at 18 PSI vs. 22 PSI is HUGE, but if you look at the needle gauge on your floor pump there’s simply no way it gives you that precise of a measurement, the margin of error is just too big. I have a very nice Park Tool floor pump that just says “30, 40, 50” and doesn’t even have any hash marks in between them. You can’t measure very precisely with a gauge like that.
Now, if you’re inflating a road bike tire to 95 PSI for example, and the gauge is a little off and you actually end up at 90 PSI or 100 PSI, no big deal. You’ll barely feel a 5 PSI error on a road bike, if you can feel it at all. But a 5 PSI error on a cyclocross bike is MASSIVE. That’s why we need an external gauge to measure with more precision.
Use a high-quality, precise handheld gauge
There are some great gauges on the market you can get into for less than $30.
One popular model is called Accu-Gage by Meiser with a needle gauge that reads from 0-30 PSI. Since the range is so small, it’s very accurate for picking up small changes in pressure. With a gauge like this you can comfortably set tire pressure down to increments of about 1 PSI - very precise. The 0-30 PSI range is useless for road bikes but works great for cyclocross and MTB.
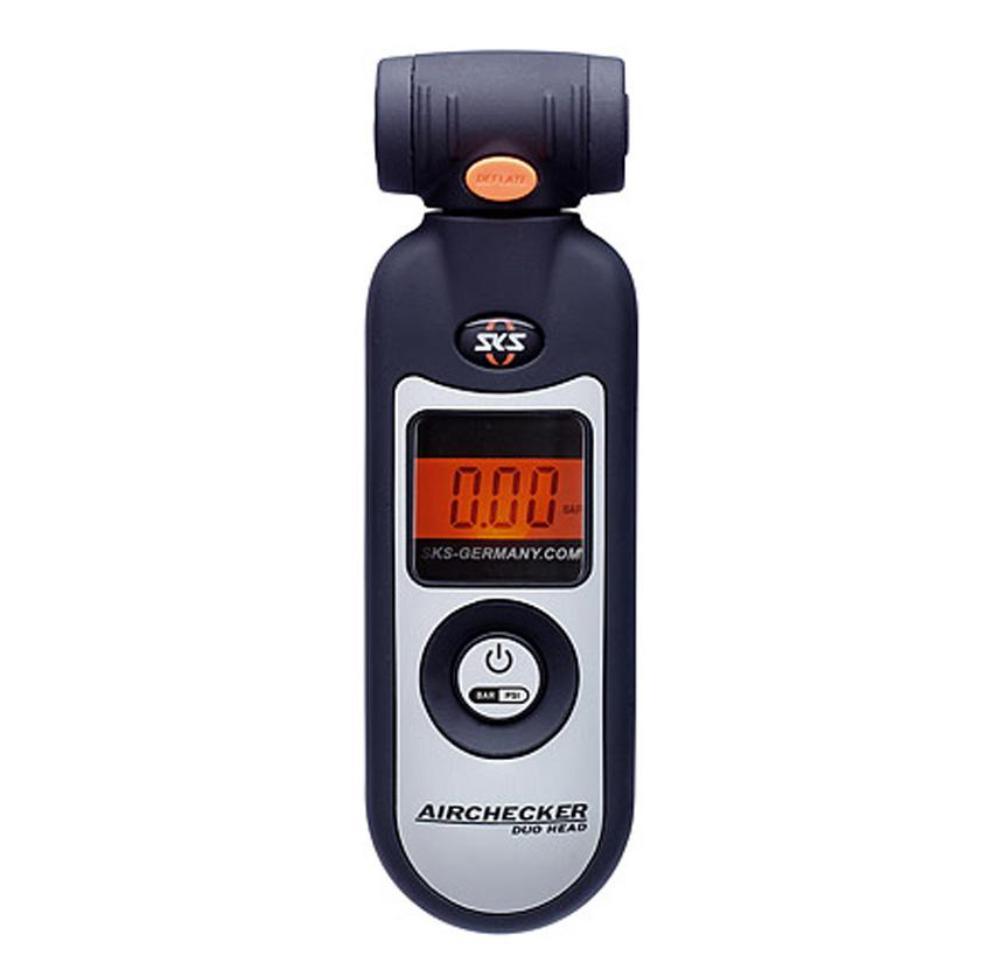
You can also get an excellent digital gauge if you prefer, such as the SKS Airchecker. Regardless of which one you buy, make sure you get one with a bleed valve you can tap to release air from the valve, and grab one small enough to fit in your jersey pocket, because we’re going to use it on-site at the race venue.
If you own an electric air compressor (useful for seating tubeless tires, as well as handling your day-to-day inflation needs) there is also a digital version of the Prestaflator Pro inflator head, with a precise digital readout of your tire pressure. These are very useful in the garage/shop for training rides and testing, but generally aren't portable for race day. They do work great for setting tire pressure for training and testing sessions though.
How to set the tire pressure
What you want to do with your external gauge is first slightly overinflate the tire using your floor pump, so for example if I think I want 25 PSI in my race tires, I’m going to use the not very precise gauge on a my floor pump to put in 35 PSI to get started. Then I’ll put my handheld gauge on, and knowing that gauge on the floor pump isn’t very accurate, my handheld gauge is going to show me the pressure is really 30 PSI or 38 PSI or whatever.
From there I’ll then tap the bleed valve slowly to bring down the pressure to exactly where I want it.
So that’s how you measure and set a very precise PSI, but how do you know what right pressure is to use in the first place? A good starting point is the method I first heard about from (now-retired) pro, Helen Wyman:
Helen Wyman's method for setting tire pressure for cyclocross
Helen’s method for setting up her tubular cyclocross race tires is your weight in pounds, divided by ten, and then add 5 to that to get a starting point. So for example, I weigh 160 lbs, 160 divided by 10 is 16, add 5 to that, and you get 21 PSI. I tend to race on tubular tires at about 22 PSI so that method is very close to dead-on for me.
For tubeless cyclocross tires with sealant, Helen likes a similar formula, this time it’s your weight in pounds divided by 10, and then add 10 to that. Using my weight of 160 lbs, works out to 26 PSI. Note: tubeless tires will always require more pressure compared with tubulars - one of the key benefits of tubulars for racing.
Keep in mind if you are using tubular or tubeless tires, it’s OK if you feel them bottom out on the rim, perhaps once or twice per lap, as you go over obstacles. That’s how you know you’re maximizing the capabilities of that tire. Obviously you want to minimize heavy impacts to protect the rim/wheel.
If you’re using traditional clincher tires with an inner tube, you’ll notice quickly that this method doesn’t work. I would get pinch flats if I tried to use a PSI as low as that formula suggests. Cyclocross is very inclusive, so if you have clinchers don’t let that stop you from trying the sport, but do note that it will stop you from running the tire pressure as low as you might like for best performance. As you begin to take the sport more seriously, you'll quickly outgrow your tires with inner tubes.
Try the Wyman formula using your own body weight, use that number as a starting point, and then go experiment during training. You want to find a park with a variety of terrain that simulates race conditions with pavement, dirt, grass, mud and so on. Start with the Helen Wyman formula, then start adding pressure 2 PSI at a time. You’ll notice that the bike becomes less comfortable, bumps are transmitted to your upper body and rear end, and as you add more pressure, the tire tends to chatter and slip as you corner.
Learn what the correct PSI feels like by testing
For me a good indicator of over-inflated tires is when I feel like I’m bouncing off obstacles instead of rolling over them.
You can then go the other direction - take out 2 PSI at a time. Less pressure allows the tire to deform on the trail so the knobs can stay on the ground during cornering. It’s going to be more comfortable as you reduce pressure too. Keep going and take out even more air and you’ll find that tire starts to feel squirmy and unpredictable. Even further and you’ll start getting pinch flats or rim dings, we know we went too low. Our goal is to find the sweet spot between those two extremes.
Keep in mind there is no one tire or tire pressure that works perfectly on every part of the course. You may need to set a tire pressure that feels a little soft on pavement to get the handling characteristics you want on bumpy and loose terrain. The right PSI is the one that gets you around the entire course as quickly as possible, not necessarily the PSI that allows you to ride a specific course feature or corner.
What to do on race day
Let’s talk about what to do on race day. You’ve got your Helen Wyman number in mind from the testing you did, but every race course is different, so we’re going to start with the Wyman number and then adjust for the conditions of the day’s course which brings us to course inspection.
Previewing the course is a critical aspect of cyclocross. Knowing where the turns are, anticipating where to shift or dismount in advance is a must, and you get that information while pre-riding. So get to venue far in advance to allow some time for course inspection.
I like to ride multiple laps as part of the pre-ride, one at slow speed while I learn the course and then one at ‘full gas’, which can also be part of your warm up routing. Take your handheld gauge with you in your back pocket so you can experiment during your pre-ride to find just the right pressure.
Note that if you’re running tubular tires, they often use latex tubes, which bleed air, and it can be a noticeable difference after just a couple hours, so do the final setup immediately prior to your race.
Don’t forget to set the tire pressure on your pit bike or pit wheels too, if you’re lucky enough to have them.
Keep in mind different rim/tire combinations perform differently, so if you’re changing out equipment, repeat the test. Race day isn’t the time you want to discover your new gear has some strange handling quirk, or your tubeless tires burp air at low pressures.
After the race
When your race is over, write it down! Make a record of the race location, conditions, terrain, and which tires and PSI you used, which can help simplify setup if you do that same race again in the future.
In closing I’d like to note that many riders like to have a little more pressure in the rear tire compared with the front, so you may end up with two numbers to record, not just one. I find for example that my remounts sometimes aren’t very clean and smooth, so I like to have a little higher PSI in the rear tire to prevent it from squirming and bottoming out when I remount.
I hope this gives you some ideas to think about how you can improve your performance by tweaking tire pressure.
Where to go from here
While you’re still reading, I also wanted to tell you about my SMS text messaging list at RideCX.com. I created it especially for people like me who love cyclocross. If you want notifications about new how-to tips, tips, race coverage and special offers, visit the signup page.
It’s totally free and I send a text message about once every two weeks with only the most relevant info, so I’m not going to blow up your phone. Sign up and I'll instantly send you a coupon for $5 off your first order from RideCX.com too!
Thanks for reading.